![[team] image of individual team member (for a plumbing service)](https://cdn.prod.website-files.com/69bee43acb5b8eaa4ccc3c54/69c707306d2674c00f5baad7_washer-reapair.png)
.avif)
Washing Machine Repair
Professional Washing Machine Repair in Brooklyn & Manhattan
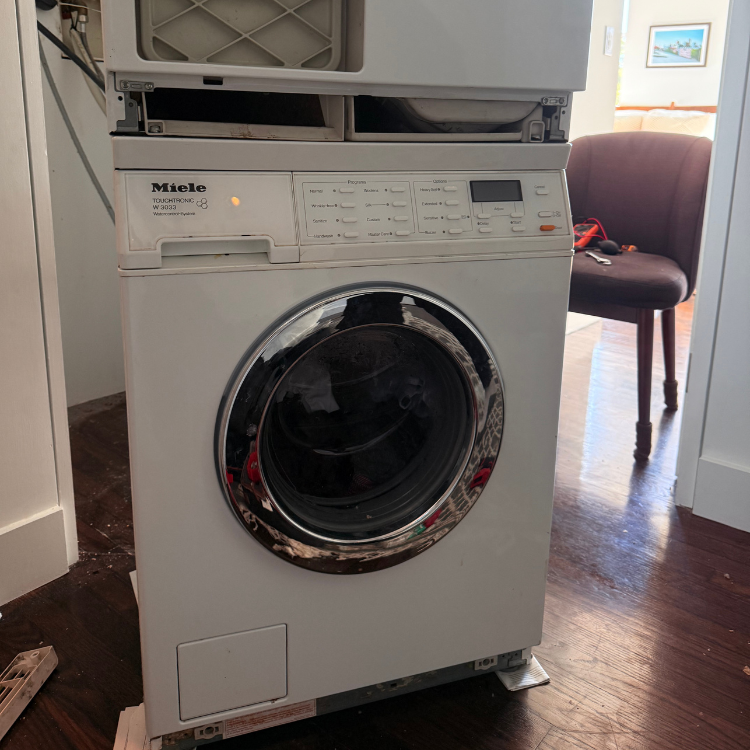
A broken washing machine in New York City means laundromat trips through crowded streets, laundry bags on the subway, and mounting costs that add up fast. Volt & Vector gets your washer back online with same-day service across Brooklyn and Manhattan. Our factory-trained technicians carry parts for all major brands on the van: LG, Samsung, Whirlpool, Miele, Bosch, GE, KitchenAid, and Maytag. We work in every building type across the boroughs — from stacked laundry closets in Williamsburg condos to full-size front-loaders in Upper West Side co-ops to basement laundry rooms in Carroll Gardens brownstones. When your washer is down, we move fast — because laundry cannot wait.


DIY vs Pro
DIY vs. Professional Washing Machine Repair
A few washing machine maintenance tasks are accessible to a careful homeowner. Most mechanical and electrical repairs are not — and attempting them in an NYC apartment carries added risk.
Safe to DIY: Cleaning the door boot seal and door glass, clearing the pump filter on front-loaders (refer to your manual — most have a panel access point), cleaning the detergent dispenser drawer, and checking that the machine is properly leveled.
Call Volt & Vector: Drum bearing replacement on a front-loader requires complete disassembly — the drum must be removed — and improper reassembly causes vibration and noise that damages other components. Motor replacements and control board work involve electrical connections that must be properly made to avoid failure cycles or fire risk. Most critically, any repair that involves water connections in an NYC building creates liability if a leak damages the unit below. Our licensed, insured technicians provide a 90-day labor guarantee on all washing machine repairs — a DIY attempt provides none.
.JPEG)
Diagnostic Process
How We Diagnose Washing Machine Issues
Every washing machine service call follows a structured diagnostic process rather than parts replacement by trial and error.
We begin by running the machine through its cycle stages — fill, agitate, drain, spin — and observing where the failure occurs. For front-load machines from Miele, Bosch, and LG, we access the service diagnostic mode to pull stored fault codes and identify intermittent failures that don't always trigger visibly. We inspect the door seal, drum bearings, pump, and motor in sequence. For top-loaders, we check the lid switch, water level pressure switch, and motor control board. This systematic approach means we identify the actual failing component — not a symptom of it — on the first visit. Most common washing machine repairs are same-visit with parts from our fully stocked service van.

New York City — What's Different
Washing Machine Repair in Brooklyn & Manhattan
NYC apartment laundry setups range from stacked 24-inch compact units to full-size 27-inch machines — and each building type presents different access challenges that our technicians navigate every day.
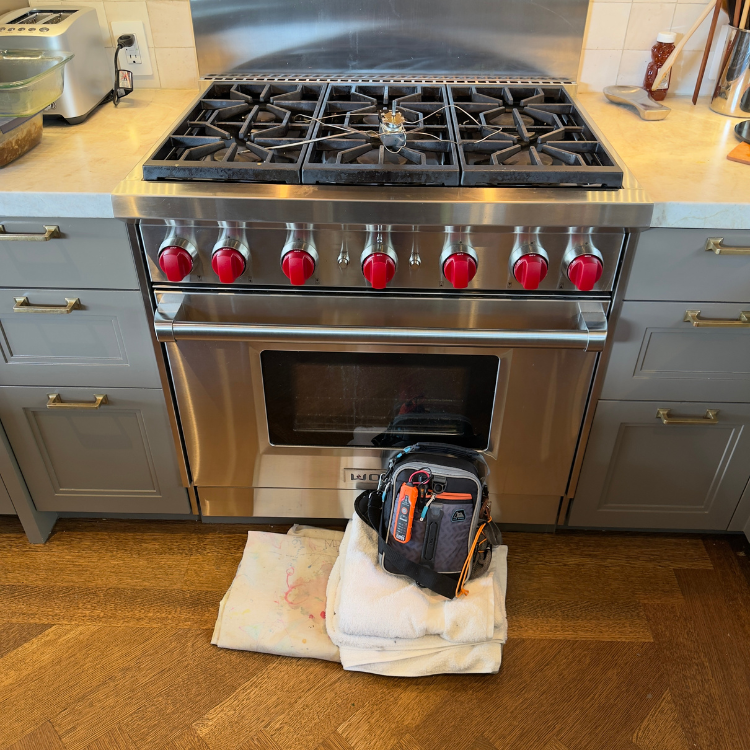
In Brooklyn, pre-war brownstones in Cobble Hill, Boerum Hill, and Park Slope often have washer-dryer units installed in kitchen closets or converted pantry spaces with limited clearance. New construction in DUMBO and Greenpoint more commonly features full-size laundry rooms with proper utility connections. In Manhattan, luxury condos in Tribeca and West Village typically have dedicated laundry rooms with premium front-load machines, while smaller apartments on the Upper East Side and in Murray Hill often use compact ventless condensation dryers paired with slim washers. We work fluently across all configurations.
Symptoms
Symptom Guide: What Your Washing Machine Is Telling You
Machine Won't Start Despite Having Power
A washing machine that powers on (display illuminated) but won't start a cycle when you press Start has one of several faults: the door latch switch is not confirming closure to the control board, the child lock is active (check the display for a lock icon), a stored fault code is blocking cycle initiation, or the control board has failed. Check whether the display shows any fault code or lock indicator before calling. On front-loaders, verify the door is fully latched by firmly pressing it closed until you hear a click. On LG ThinQ connected washers, a pending software update can occasionally prevent cycle start via the physical panel. Urgency: Moderate — no damage risk but machine is non-functional.
Machine Fills with Water But Drum Doesn't Rotate
Water entering the drum but no drum movement during the wash cycle points to a failed motor coupling on direct-drive top-loaders, a failed drive belt on belt-drive machines, a failed motor start capacitor, or a control board that has lost communication with the motor controller. On Samsung front-loaders, the BLDC motor hall sensor failure produces exactly this symptom: the drum fills correctly then sits without rotation. The motor makes a brief attempt sound — a soft hum — then stops. On Miele washers, the tachogenerator failure produces the same symptom. Our technicians are trained on the specific failure signatures for each platform. Urgency: High — water is in the drum and must be drained manually if repair is not immediate.
Clothes Come Out Excessively Wet After Spin Cycle
If the spin cycle runs (you can hear the motor accelerating) but clothes are still soaking wet at cycle end, the machine is not reaching spin speed. Common causes include an out-of-balance load aborting the high-speed spin before completion — redistribute the load and retry before calling — failing shock absorbers that prevent the drum from reaching high RPM without triggering the vibration sensor cutout, or a worn drive belt that slips at higher motor torques. On top-loaders, a worn clutch assembly that no longer transfers motor torque fully to the drum during spin is the primary cause of inadequate spin extraction. Urgency: Moderate — clothes can be wrung and dried, but efficiency loss is significant.
Water Continues Filling and Won't Stop
A washing machine that fills beyond the normal level and continues adding water indicates a failed water inlet valve that is mechanically stuck open — not closing when the solenoid de-energizes — or a failed water level pressure switch that is not signaling the control board to close the inlet valve when the tub is full. This fault requires immediate attention: if the machine overflows, the tub capacity is exceeded and water runs across the floor and potentially into the apartment below. Turn off the water supply valve behind the machine immediately and call for service. Urgency: Critical — active flood risk if not addressed immediately.
Detergent Remaining in Dispenser After Wash
Detergent left in the dispenser drawer after a completed wash cycle indicates the inlet water is not flushing the dispenser correctly — typically due to a blocked or partially blocked dispenser flush nozzle, a failed secondary water inlet solenoid that controls dispenser flushing, or a detergent dispenser housing clogged with residue from liquid detergent use. In NYC apartments, liquid detergent used without periodic dispenser cleaning creates a thick residue buildup in the dispenser channels that eventually blocks water flow. Remove and clean the dispenser drawer thoroughly with hot water and a brush. If cleaning does not resolve the issue, the inlet solenoid or dispenser housing requires service. Urgency: Low — clothes are cleaning but with reduced detergent effectiveness.
Maintenance Tips
What to Expect From Our Washing Machine Service
Volt & Vector service calls are built around one principle: fix it right, explain what we found, and get out of your day.
When you book, you get a confirmed two-hour arrival window — no all-day waiting. Our technician arrives with a stocked van covering common parts for every brand we service. After diagnosis, we present a written flat-rate estimate. If approved, we complete the repair on the same visit in the majority of cases. For stackable laundry units in tight closets — common throughout Chelsea and Williamsburg apartments — we carry the tools and techniques to work in confined spaces without damaging cabinetry or flooring. All repairs include a 90-day labor warranty. We document the repair so your service history is on file for future calls. If we find that a second appliance in your laundry setup needs attention — such as a dryer in the same stack — we assess it at no extra trip charge.
Case Logs
Field Case Log: Samsung WF45R6100AW Repair on the Upper East Side
A client on the Upper East Side contacted Volt & Vector regarding a Samsung WF45R6100AW front-load washing machine that was displaying error code 4E and refusing to start any wash cycle. The unit was approximately 19 months old, installed in a dedicated laundry closet adjacent to the kitchen in a prewar co-op apartment. The client had already attempted a hard reset by unplugging the machine, which did not clear the error.
Error code 4E on Samsung washing machines indicates a water supply issue — either no water is reaching the machine or water flow is insufficient to fill within the timeout period. The technician confirmed that the household water shutoff valve behind the machine was fully open. Checking incoming water pressure with a gauge revealed only 18 PSI at the machine connection point — significantly below the 20–12 PSI minimum required for reliable Samsung inlet valve operation. The prewar building's water pressure on this upper floor was the primary cause.
However, further inspection revealed a secondary contributing factor: the inlet valve screen filters were heavily calcified with mineral deposits, reducing effective flow area by approximately 60% from their original clear state. At normal building water pressure, this restriction alone would not have prevented fill; combined with the low building pressure, it created a fill rate below the machine's minimum threshold. Both inlet valve screens were cleaned with a descaling agent, and the inlet valve solenoids were tested and confirmed functional. The client was advised to contact building management regarding the low water pressure — a building plumbing issue affecting multiple appliances — and was given documentation of the measured pressure for that conversation. Post-repair test cycles completed without error codes. The 180-day warranty was documented on the written receipt.
Frequently Asked Questions About Washing Machine Repair
How long does a washing machine repair take?
Most washing machine repairs are completed in a single visit of one to two hours. We stock common parts for all major brands — including door boot seals, pump assemblies, motor couplings, and control boards — on our service vehicles. If a specialty part needs ordering, we schedule the follow-up visit before leaving and typically complete the repair within two to three business days.
My washer smells like mildew — is that a repair issue?
Mildew odor in a front-load washer is almost always caused by residue buildup on the door boot seal and in the drum — not a mechanical failure. Clean the seal weekly and run a hot sanitize cycle monthly with washer cleaner tablets. If the odor persists after cleaning, the boot seal may need replacement due to small tears that trap moisture. We can inspect and replace it on a service visit.
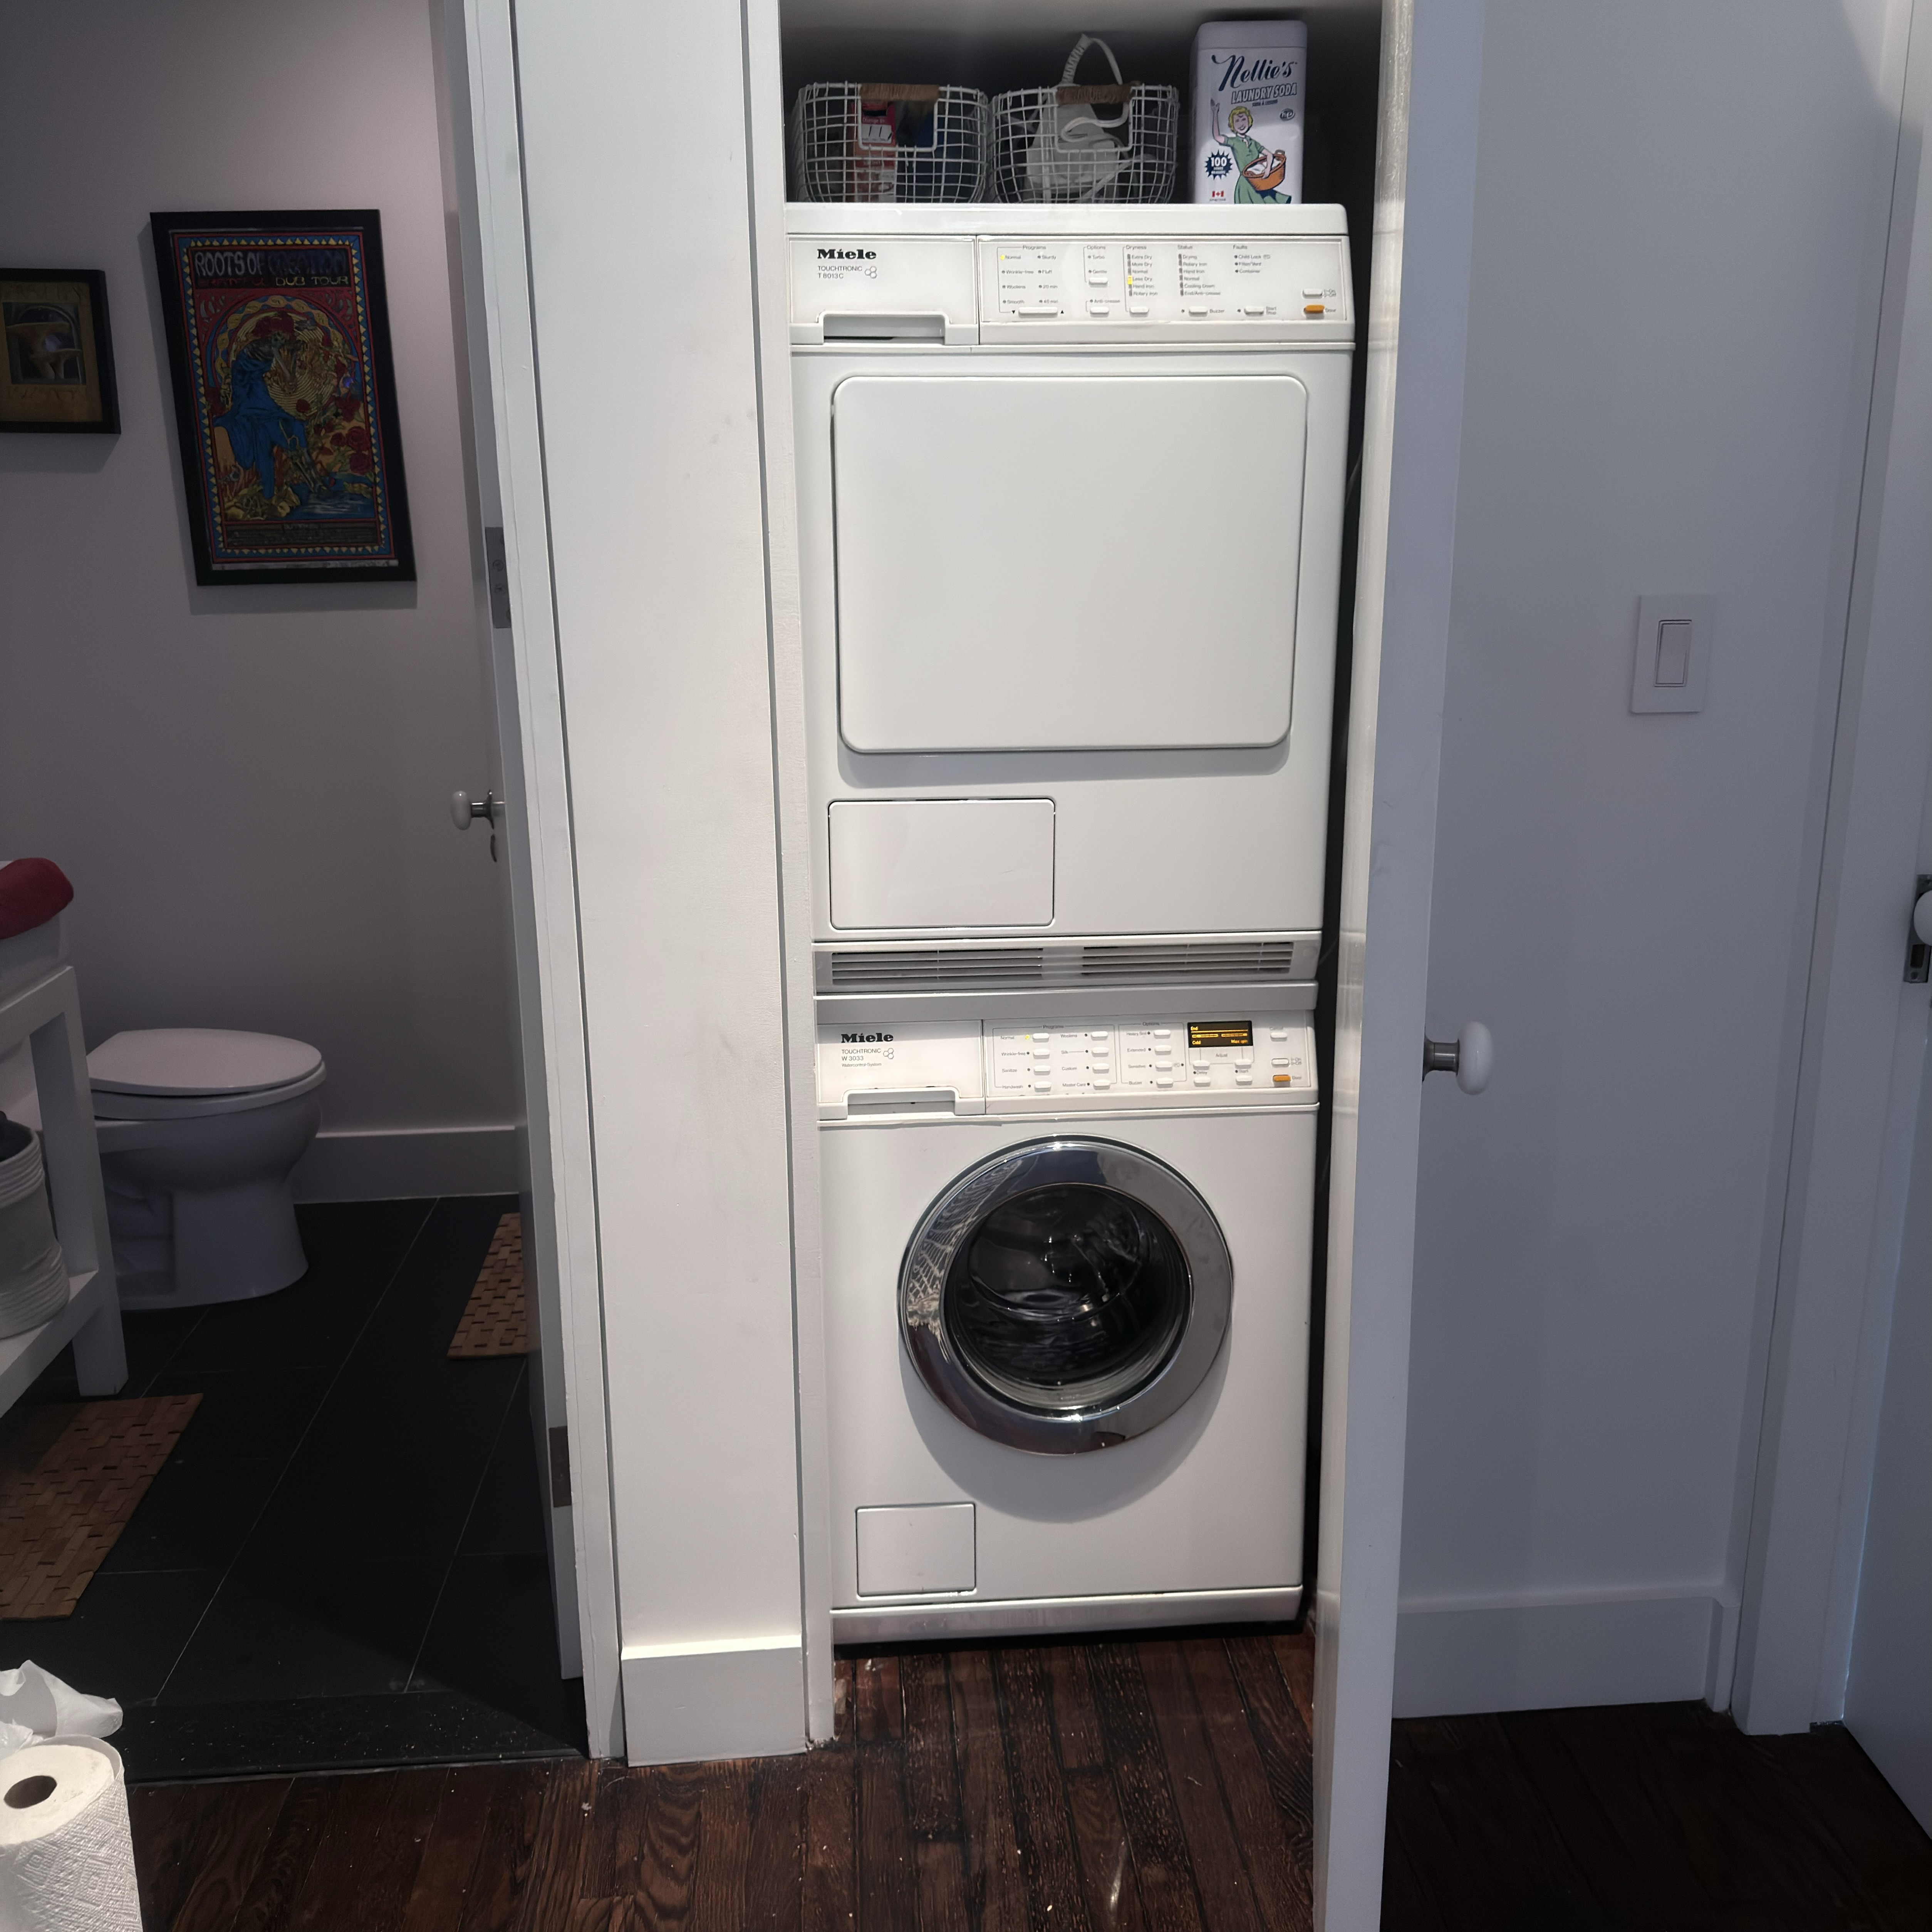
Can you repair stacked laundry units in a tight closet?
Yes — stacked units in laundry closets are one of our most common NYC service scenarios. We have the tools and techniques to work in confined spaces, and we can often repair the washer without fully unstacking the unit. If the repair requires removing the dryer first, we handle that as part of the service call at no extra charge.
My Samsung washer shows an error code — what does it mean?
Samsung washers display specific codes for different failure modes: UE or U6 means unbalanced load, 4E or 4C is a water supply error, 5E or 5C is a drain error, and DC is a door lock issue. While some codes resolve after a reset, recurring codes indicate a real component failure. Our technicians use Samsung's diagnostic interface to confirm the cause and repair it properly. See our dryer repair page if your Samsung dryer also has issues.