
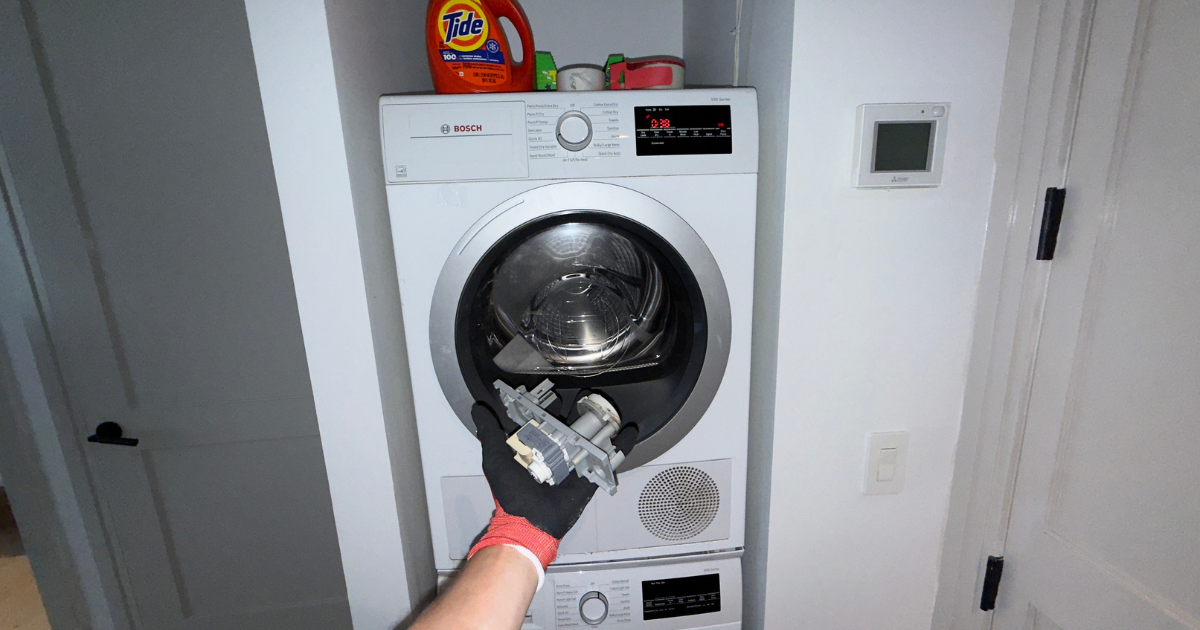

Bosch Dryer Not Drying Clothes: Safe Diagnostic Path
If a Bosch dryer runs but clothes stay damp, separate a load or program issue from airflow restriction, no heat, or an early sensor-cycle stop.
If a Bosch dryer runs but clothes stay damp, separate a load or program issue from airflow restriction, no heat, or an early sensor-cycle stop.
If a Bosch dryer runs but clothes remain damp, first determine whether the load stays cold, becomes warm but damp, or the cycle ends much earlier than expected. Check the program, washer spin, load size, lint filters, accessible moisture-sensor surfaces, and the exact model’s exhaust or condenser airflow path. Stop after those safe checks if the dryer has no heat, repeatedly stops, shows an error, overheats, smells burned, or trips a breaker.
“Not drying” describes the result of a cycle, not one failed part. A dryer must receive laundry that has been spun adequately, move the load through a controlled stream of air, add or transfer heat, remove moisture from that air, and decide when the target dryness has been reached. A failure or mismatch at any one of those stages can leave clothes damp.
The temperature and timing of the failed cycle provide the most useful first evidence:
Bosch sells vented and ventless dryer designs, and their care points are not interchangeable. A vented model sends moist air through an exhaust duct. A condenser or heat-pump model handles moisture inside the appliance and may use model-specific filters, a condenser or heat-exchanger area, and a water container or drain connection. Use the E-Nr/model number and the matching U.S. manual before opening any user-accessible service flap.
Record one failed cycle. Note the selected program, approximate load, whether the washer completed its final spin, cycle duration, load temperature at the end, and any display message. That record is more useful than repeatedly changing programs because it preserves the difference between insufficient heat, poor moisture removal, and an early automatic stop.
Do not use “more heat” as a universal test. A high-temperature program can be wrong for the fabric and will not correct a blocked air path. Do not run repeated cycles if the cabinet, plug, outlet, laundry, or room becomes abnormally hot.
“Not drying” describes the result of a cycle, not one failed part. A dryer must receive laundry that has been spun adequately, move the load through a controlled stream of air, add or transfer heat, remove moisture from that air, and decide when the target dryness has been reached. A failure or mismatch at any one of those stages can leave clothes damp.
The temperature and timing of the failed cycle provide the most useful first evidence:
Bosch sells vented and ventless dryer designs, and their care points are not interchangeable. A vented model sends moist air through an exhaust duct. A condenser or heat-pump model handles moisture inside the appliance and may use model-specific filters, a condenser or heat-exchanger area, and a water container or drain connection. Use the E-Nr/model number and the matching U.S. manual before opening any user-accessible service flap.
Record one failed cycle. Note the selected program, approximate load, whether the washer completed its final spin, cycle duration, load temperature at the end, and any display message. That record is more useful than repeatedly changing programs because it preserves the difference between insufficient heat, poor moisture removal, and an early automatic stop.
Do not use “more heat” as a universal test. A high-temperature program can be wrong for the fabric and will not correct a blocked air path. Do not run repeated cycles if the cabinet, plug, outlet, laundry, or room becomes abnormally hot.
Low effort: verify the cycle and the load
Why it works: Air-only, timed cool, refresh, delicate, and low-temperature options can tumble normally without producing the result expected from a standard heated program. Automatic programs also use load feedback and may behave differently from a timed cycle.
Tools/materials: The operating manual for the exact E-Nr/model and a phone photo of the control panel.
What to do:
Common mistakes:
Why it works: The dryer has to remove whatever water the washer leaves behind. A missed or reduced final spin can make a normal dryer appear weak, especially with towels and heavy cotton items.
Tools/materials: None; the washer display or cycle history may help.
What to do:
Common mistakes:
Why it works: Drying air needs space to pass through moving textiles. A packed drum, a single bulky item, or sheets wrapped around smaller pieces can hold wet zones away from airflow and sensor contact.
Tools/materials: A clean basket.
What to do:
Common mistakes:
Medium effort: restore the user-serviceable air and sensing paths
Why it works: A film or lint layer reduces airflow even when the screen is not visibly packed. Bosch includes lint-filter care among its first not-drying checks.
Tools/materials: Soft cloth, soft brush or vacuum attachment where the manual permits, and water only if the model’s instructions allow washing.
What to do:
Common mistakes:
Why it works: On an automatic program, the machine estimates load condition from sensor feedback. Residue from fabric products can interfere with contact and contribute to an early stop.
Tools/materials: A soft cloth and only the cleaning method named in the Bosch manual.
What to do:
Common mistakes:
Why it works: The moisture-disposal path determines the next safe check. A vented machine depends on an open exhaust route. A ventless unit depends on its filter, heat-exchanger or condenser, container, drain, and room-air conditions as specified for that platform.
Tools/materials: Model label photo, exact manual, flashlight.
What to do:
Common mistakes:
High effort: isolate the installation or machine fault
Why it works: A crushed connector, lint-loaded duct, stuck exterior flap, or unsuitable run can let the drum heat while preventing moist air from leaving.
Tools/materials: Flashlight and the approved vent-cleaning equipment for accessible sections; professional duct service for concealed or shared runs.
What to do:
Common mistakes:
Why it works: A repeatable symptom after the load, program, filters, sensor surfaces, and documented airflow path are corrected gives a technician a useful starting condition. It does not identify a specific part without measurements.
Tools/materials: E-Nr/model and serial photos, cycle notes, error photo, and a short video if sound or stopping behavior matters.
Ask diagnosis to distinguish:
Common mistakes:
If you smell gas, do not operate switches, unplug the appliance, light a flame, or use a phone in the affected area. Leave the building or area, then contact 911 and the gas utility from a safe location.
Heat alone does not remove moisture. The load must tumble freely and moist air must move through the approved exhaust or condenser path. Start with load separation, filters, airflow, and incoming laundry wetness.
The selected program, a small or mixed load, limited sensor contact, or residue on accessible sensor surfaces can affect an automatic endpoint. Confirm the program and clean only the sensor area identified in the model manual.
Heat-pump models commonly dry at lower temperatures than traditional vented designs. Judge the result against the correct program and manual rather than using drum temperature alone.
On a vented model, yes. A restricted exhaust can retain heat and moisture and extend drying. Ventless models use a different moisture path, so identify the platform first.
Only if the exact manual permits it. If washed, protect the mesh and reinstall it only after it is fully dry and correctly seated.
No. The dryer may be heating while airflow, load movement, sensor behavior, or moisture disposal is inadequate. A cold load on a confirmed heated program is more relevant to a no-heat diagnosis.
Yes. If the washer fails to drain or complete an appropriate final spin, the dryer receives much more water and may not finish within the usual time.
Not if the dryer becomes abnormally hot, stops, smells burned, or shows a warning. One controlled comparison is enough after safe corrections; repeating cycles can hide the pattern and increase risk.
Provide the E-Nr/model and serial details, selected program, load type, end temperature, approximate run time, display photo, and the checks already completed.
Use the Bosch no-heat path when a confirmed heated program tumbles normally but the load stays cold. That narrower symptom requires power and heat-system diagnosis rather than a general drying-result checklist.
Bosch requests are considered in Brooklyn, Manhattan below 96th Street, and selected Queens routes including Astoria and Long Island City when the exact address and route availability are confirmed.
.jpeg)


Technician experience standard: 4+ years of hands-on appliance repair per technician; senior technicians bring 8 and 16 years. Bosch intake starts with the complete E-Nr, failed cycle stage, display, and installation access. Independent service; no current manufacturer authorization implied.

