
A weak refrigerator door seal costs you $50–$100/month in wasted energy. Here's what it means and when replacement is urgent.
A deteriorating refrigerator door gasket doesn't just waste energy—it cascades into compressor overwork, frost buildup, and eventual failure. We explain the diagnostic tests, brand-specific costs, and exactly when to replace before damage spreads.

.jpeg)
.jpeg)


.jpeg)

A refrigerator door gasket that isn't sealing properly is one of those problems that feels minor but runs silently expensive. Your compressor runs more frequently — sometimes continuously — trying to compensate for the warm air constantly leaking in. Energy consumption climbs. The compressor wears faster. In humid NYC summers, that warm moist air entering the fridge cabinet condenses and creates frost buildup on evaporator coils, which then triggers defrost cycle overloads or ice maker malfunctions. What started as a $80–$150 gasket replacement quietly becomes a cascade into bigger, more expensive problems.
I've traced compressor failures in 6–8 year-old refrigerators back to years of sealing neglect. The gasket isn't a cosmetic part. It's doing real mechanical work every time that door closes.
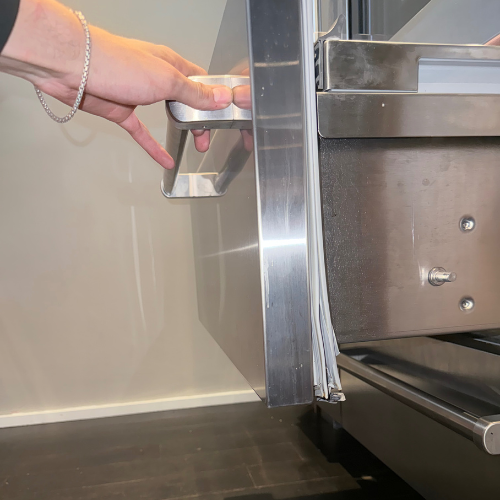
The door gasket is the flexible magnetic strip that runs around the perimeter of each refrigerator door (and freezer door on bottom-freeze models). It works through two mechanisms: the physical pliability of the rubber or vinyl material conforming to the cabinet frame, and a magnetic strip embedded inside the gasket that pulls the door seal tight against the refrigerator body.
The magnetic component is why older-style gaskets required significant force to open the door. Modern gaskets are designed for lighter closing force, which is why seemingly minor deformation — a crease, a hardened section, a small tear — can break the seal without the gasket visually appearing damaged from a distance.
The most reliable field test is the dollar bill test: close the refrigerator door on a dollar bill so half of it is inside the cabinet. Pull the bill out. You should feel moderate resistance. Repeat this test at multiple points around the door perimeter — top, bottom, both sides, and especially the corners. If the bill slides out easily at any point, you have a sealing gap at that location.
A secondary indicator: condensation or frost forming on the outside edges of the freezer or refrigerator door. This happens when warm air leaks in past a failing gasket, hits the cold interior surface, and creates moisture. In NYC apartments with central AC running in summer, you may not notice this because the ambient humidity is lower — but the gasket failure is still causing compressor strain.
A third diagnostic sign that experienced technicians use: listen to the compressor runtime. A properly sealed refrigerator compressor should cycle on and off periodically. A compressor that runs almost continuously — audible as a constant low hum from the back of the unit — is often working overtime to compensate for warm air infiltration through a failing seal.
In NYC apartments, gasket degradation follows predictable patterns based on building conditions and usage.
Material hardening and cracking: The most common failure mode. Rubber and vinyl gaskets harden over time through a combination of heat, cleaning chemicals, and simple aging. A gasket that was pliable at year two may be stiff and brittle by year seven or eight. Hard gaskets can't conform to the door frame, leaving microscopic gaps along their full length that collectively allow significant air exchange.
Physical deformation: NYC apartment refrigerators get moved more often than appliances anywhere else — renovations, tenant turnover, furniture rearrangements. Each time a refrigerator is moved and the doors are opened against walls or pushed at angles, gasket deformation can occur. A kinked or crushed section of gasket won't spring back to its original profile.
Mold and mildew degradation: In NYC buildings with ventilation issues or high ambient humidity, gaskets are particularly vulnerable to mold growth in the folds and channels of the seal. Mold compromises the material integrity over time. The black spots visible in gasket folds aren't just an aesthetic issue — they indicate active material breakdown.
Magnetic strip weakening: The embedded magnets that help the door seal pull tight are not permanent — they demagnetize gradually over years of use. A gasket that physically looks intact but doesn't hold a firm magnetic seal is a common source of intermittent sealing failures that confuse homeowners who inspect the gasket visually.
The honest answer: sometimes, on standard freestanding refrigerators. On premium integrated or built-in models, almost certainly not without professional assistance.
For standard freestanding units (GE, Samsung, LG, Whirlpool), replacement gaskets are available as OEM parts for most models currently in production. The physical process involves pulling the old gasket from its channel (it clips or slides into a groove around the door liner), ordering the exact OEM part for your model number (find it on the label inside the door frame), and pressing the new gasket into the channel. Some models require removing the inner door panel, which involves Phillips screws and some disassembly.
The complications that make this harder than it looks: (1) OEM gaskets for models more than 8–10 years old may be discontinued; (2) aftermarket replacement gaskets have inconsistent fit quality and often don't seal as well as OEM parts; (3) on bottom-freezer and French door refrigerators, the lower door gasket installation requires significant contortion to work around the bottom hinge; (4) Sub-Zero, Viking, Thermador, and other luxury brands use proprietary gasket channels and fastening systems that require brand-specific tools and knowledge.
Sub-Zero refrigerators, which are common in upscale Manhattan and Brooklyn apartments, use a magnetic gasket system that differs substantially from standard models. Sub-Zero uses a two-part door seal system: an inner door-to-frame gasket and a secondary magnetic seal. The gaskets are model-specific and only available through Sub-Zero authorized distributors.
More importantly, Sub-Zero door hinges and panel systems are integrated — improper gasket installation can affect door alignment, which then creates new sealing problems even after the gasket itself is replaced. For Sub-Zero gasket work, insisting on a factory-authorized technician is not just a warranty recommendation, it's the practical choice to avoid compounding the problem.
Not every sealing failure is a gasket problem. Three other causes can mimic gasket failure symptoms:
Door hinge wear: Over years of use, refrigerator door hinges wear, causing the door to hang slightly out of alignment. A properly functioning gasket on a misaligned door won't seal correctly — replacing the gasket without addressing the hinge misalignment wastes money. A trained technician can adjust hinge positioning; this is not a DIY operation on most modern refrigerators.
Warped door liner: If the inner door liner has warped — from heat exposure, impact, or age — the gasket has no flat surface to seal against. A new gasket on a warped liner will still fail. In these cases, door liner replacement or full door replacement is the correct repair path.
Overpacking the refrigerator: NYC apartments often have small refrigerators relative to household size, and overpacking is common. Food items pressing against the door from inside prevent the door from closing fully, simulating a gasket failure. The dollar bill test will reveal this: if resistance is uniform except at specific spots where items are pressing outward, rearranging contents may resolve the sealing issue entirely.
Gasket life can be meaningfully extended with regular cleaning. Every 90 days, wipe down the full gasket perimeter with warm water and a small amount of dish soap. Rinse thoroughly — residual soap can accelerate rubber degradation. Dry completely, especially in the fold channels where moisture accumulates. Do not use bleach, harsh degreasers, or solvent-based cleaners on gaskets — these accelerate cracking and hardening.
Applying a thin coat of petroleum jelly to the gasket surface periodically — once every six to twelve months — keeps the material supple and extends its useful life. This is a standard practice in commercial refrigeration and translates well to residential units.
A properly sealed refrigerator runs its compressor in cycles, keeps even temperature throughout, and doesn't frost up near the door edges. Any deviation from this is worth a professional diagnosis before the problem escalates to compressor damage.


