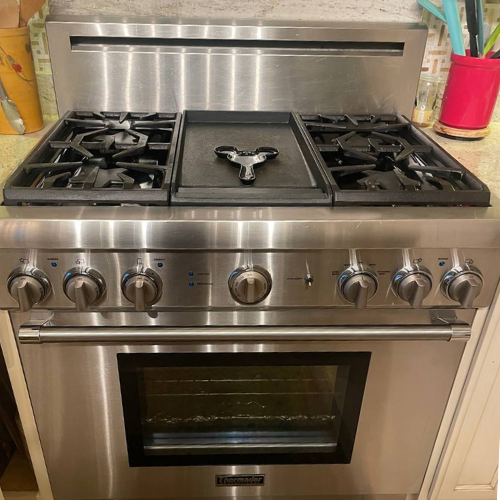
Appliance repair service in New York City - Brooklyn

Thermador Appliance Repair NYC & Brooklyn | Volt & Vector

Arrival windows
9–11 AM · 11 AM–1 PM · 1–3 PM · 3–5 PM
Serving NYC
Manhattan, Brooklyn & Select Areas of Queens
Response time
< 5 Minutes
Response rate
100%
Diagnostic fee: $99
Credited toward the repair when you proceed
Thermador repair in NYC for ranges, ovens, cooktops, refrigeration, and dishwashers. Send the full E-Nr, fuel, and failed function.

Volt & Vector provides independent residential Thermador appliance repair in Brooklyn, Manhattan below 96th Street, and selected Queens routes. Supported requests include gas, dual-fuel, electric, and induction ranges; gas and induction cooktops; wall and steam ovens; built-in and column refrigeration; and dishwashers. Exact product, address, installed access, route capacity, and appointment timing are reviewed before a visit is confirmed.

Start with the complete E-Nr, FD, and Z-Nr, then identify fuel, platform, and the exact function that failed. Pro Harmony and Pro Grand ranges, separate gas cooktops, Freedom induction, wall and steam ovens, refrigeration columns, and panel-ready dishwashers can look related while using different controls and service paths. The surface, oven cavity, refrigeration compartment, ice system, and dishwasher cycle must be described separately.

Volt & Vector is not affiliated with, endorsed by, or authorized by Thermador. Thermador controls its warranty, Factory Service, designated-provider, and manufacturer-managed routes.

Quick Answers

What should I send before requesting Thermador repair?

Answer: Send a complete rating-label photo showing E-Nr, FD, and Z-Nr; the appliance and fuel type; affected burner, zone, cavity, compartment, ice function, or dishwasher stage; exact display; short symptom video; safety status; exact address; and wide installation photos.

Does a Thermador code identify the failed part?

Answer: No. It selects a platform-specific condition or route. Short and long formats can belong to different generations, and XLO, dE, and UP can describe normal operating or software states.

Is every cycling ExtraLow flame a fault?

Answer: No. Thermador documents automatic on/off cycling within designated XLO settings. Failed relight, delayed ignition, unstable flame, or gas odor is a different and potentially unsafe condition.

Does the professional appearance identify gas or dual-fuel?

Answer: No. Confirm E-Nr and fuel. Surface burners and oven cavities can use different energy paths, so record the results of surface, bake, broil, convection, and steam separately.

Can panel-ready or built-in Thermador products be reviewed?

Answer: Yes, subject to exact-model and access review. Send panels, toe-kicks, cabinetry, floor, ventilation, shutoffs, door swing, clearances, and building requirements; do not extract the appliance.

When should routine use stop?

Answer: Stop for gas odor, delayed ignition, smoke, sparks, burning odor, repeated breaker trips, active leakage, cracked glass, uncontrolled heat, or rising refrigeration temperatures.

Thermador Appliances We Repair

  • Combined ranges: Use Thermador range repair after confirming E-Nr and gas, dual-fuel, electric, or induction. Record surface and oven functions separately.
  • Separate gas or electric cooktops: Use Thermador cooktop repair. State whether the complaint concerns ignition, flame, ExtraLow, radiant heat, controls, or a cracked surface.
  • Induction cooktops: Use Thermador induction-cooktop repair. Record compatible cookware, affected zone, control state, exact display, supply event, and whether other zones heat.
  • Wall, steam, or range ovens: Start with oven repair. A built-in cavity can continue to Thermador wall-oven repair. Preserve cavity, mode, preheat, steam state, timer type, and whether heat ends with a real oven-off command.
  • Refrigerators, freezers, and columns: Use refrigerator repair. Record actual temperatures for each compartment, door and power history, frost, moisture, and cabinet ventilation.
  • Ice systems: Separate no ice production, no dispensing, small or malformed ice, and water leakage, then use the Thermador ice-maker guide.
  • Dishwashers: Use dishwasher repair. Record fill, wash, drain, heat, dry, display position, panel installation, exact code format, and whether leakage protection is active.

Common Thermador Service Requests

  • A Star burner clicks, lights slowly, or fails to establish a stable flame.
  • An ExtraLow flame cycles normally, or fails to relight and must be separated from normal XLO.
  • An induction surface shows dE, a supply-voltage code, weak heating, or a no-zone response.
  • An oven beeps with E plus a number, stays cold, heats inconsistently, or continues after the wrong timer was used.
  • One refrigeration column or compartment warms while controls remain lit.
  • The ice maker stops producing or the dispenser becomes a separate problem.
  • A dishwasher retains water, shows a short or long drain code, activates base-water protection, displays UP, or appears dark as the door moves.

These observations organize the service request. They do not prove an igniter, valve, element, pump, sensor, control, or refrigeration component.

How Thermador Diagnosis Works and What You Receive

  1. Confirm identity and platform: The full E-Nr, FD, Z-Nr, product category, and fuel select the applicable documentation and compatible configuration.
  2. Isolate the exact function: The technician identifies the burner, zone, cavity, steam function, compartment, ice function, or dishwasher phase that changed and records what still operates.
  3. Separate normal state, use, installation, and appliance failure: XLO, Demo, software update, timer selection, and panel viewing position are checked without letting those states hide an ignition, supply, temperature, drain, leak, heat, or control problem. Gas, 240-volt supply, water, ventilation, drain routing, cabinetry, panels, and floor conditions are kept visible.
  4. Explain the repair decision: The customer receives the observed finding, cause class, compatible repair route, access requirement, safety boundary, and estimate before approved work proceeds.
  5. Verify the original function: The same burner, zone, cavity, compartment, or dishwasher phase is tested again. A cleared code or blank display is not proof if the physical problem remains. See how appliance repair works.

NYC Installation and Access Planning

  • Pro range or built-in cooktop: Show fuel, adjacent cabinets, counter cutout, floor, anti-tip and access context, visible shutoff area, ventilation, and clearance without moving the appliance.
  • Wall or steam oven: Show trim, cabinet stack, door swing, adjacent panels, water or reservoir arrangement, and normal electrical access area. Do not remove trim or pull the cavity.
  • Column refrigeration: Photograph the full installation, toe-kick, panel alignment, ventilation openings, floor, door seal, and connected neighboring columns.
  • Panel-ready dishwasher: Show panel, handle, door alignment, toe-kick, sink connections, floor, and cabinet gaps. Panel weight and spring balance are part of access planning.
  • Managed building: Include elevator hours, superintendent or doorman instructions, floor-protection rules, and COI requirements with the booking request.
  • Route fit: Requests are reviewed for the Brooklyn service route, Manhattan service route, or a selected Queens route confirmed from the exact address.

Access planning is part of diagnostic readiness because platform identity, panel design, fuel, ventilation, drain, water, floor, and cabinetry can change the first safe action.

Thermador Symptom-to-Diagnosis Map

A Star burner clicks but does not light promptly.

What this usually points to: Moisture or spill residue, burner seating, ignition path, gas-supply condition, switch input, or gas control.

What we verify: Compare burners, inspect safe cool assembly alignment, observe spark and flame establishment, and stop immediately if gas odor or delayed ignition is present.

An ExtraLow flame cycles off and on.

What this usually points to: Normal XLO operation on a designated burner or abnormal relight, flame, ignition, or gas-control behavior.

What we verify: Match E-Nr and burner, preserve knob position, distinguish designed cycling from failed relight, and verify stable flame without gas odor.

Induction shows dE and no zone heats.

What this usually points to: Documented Demo status on supported controls or a continuing control-state problem.

What we verify: Confirm E-Nr, use the one official normal-control route, and verify actual zone heating after the status clears.

Induction shows E9000, E9010, or U400.

What this usually points to: Supply voltage outside the documented range, building power, branch circuit, connection, or internal power electronics.

What we verify: Preserve code and power history, separate utility or branch supply from appliance response, and avoid repeated breaker cycling.

The oven beeps with E and a number.

What this usually points to: Model-specific oven fault, sensor or control feedback, door or heat path, or—on named longer codes—a Home Connect update problem.

What we verify: Record the exact code and context, identify cavity and mode, compare requested and actual heat, and use the matching official product document.

The oven timer ends but heating continues.

What this usually points to: Kitchen Timer used as an alert instead of an Oven Timer, wrong control state, or a continuing heat-control fault.

What we verify: Identify timer type and control family, reproduce safely, and verify that a true oven-off command ends heat.

Refrigerator or column temperature rises.

What this usually points to: Door seal or alignment, airflow or frost, fan response, cabinet heat rejection, temperature feedback, defrost behavior, or cooling-system performance.

What we verify: Measure each compartment, inspect frost and airflow, check ventilation and doors, and determine whether the condition is local or system-wide.

The dishwasher shows E24/E-24 or E6102/E61-02.

What this usually points to: Drain route, accessible filter, hose or sink connection, pump response, level feedback, or control request.

What we verify: Preserve punctuation and E-Nr, establish the last cycle stage, inspect the complete route within service access, and verify drain completion.

The dishwasher shows E15/E3100.

What this usually points to: Water in the protected base, leak path, over-suds, connection, door, installation, or sensing route.

What we verify: Keep the unit level and still, locate the moisture path, inspect panel-ready access conditions, and verify there is no continuing leak.

The dishwasher appears dark when the door moves.

What this usually points to: Normal display visibility by top-control or front-control design, door or latch state, supply, interface, or control communication.

What we verify: Match the E-Nr and top-control versus front-control design, observe the normal viewing position, and verify physical cycle response before electrical diagnosis.

Thermador Visit Fit Check

  1. Identity evidence: Photograph the complete E-Nr, FD, and Z-Nr. Use Thermador's model-number finder when the normal-access label location is unclear.
  2. Platform and fuel evidence: Record range, cooktop, induction, wall or steam oven, refrigeration column, ice system, or dishwasher and confirm gas, dual-fuel, electric, or induction.
  3. Function evidence: Name the exact burner, zone, cavity, compartment, ice function, or dishwasher stage and what still works.
  4. Display evidence: Preserve capitalization, hyphens, leading digits, blinking, beeping, door position, and action occurring when the display appeared.
  5. Installation evidence: Show panels, cabinetry, ventilation, drain routing, water and gas shutoffs, electrical context, floor, door swing, and building access without movement.
  6. Safety evidence: Report gas odor, delayed ignition, active water, rising food temperature, smoke, burning odor, repeated trips, cracked glass, or uncontrolled heat.
  7. Verification evidence: Define the physical result that must be retested after repair rather than using code clearance alone.

Thermador Questions That Change the Service Route

Why can Thermador dishwasher E27 route first to qualified supply confirmation instead of a guessed appliance part?

Answer: Thermador's official dishwasher error-code guide identifies E27 as a low-supply-voltage route. That meaning changes the first boundary, but it does not prove whether the building supply, connection, or appliance is responsible. Photograph the code and the full E-Nr, FD, and Z-Nr, note any breaker interruption or other electrical symptom, and leave voltage measurement to a qualified person. Do not order an appliance part from E27 alone; smoke, arcing, burning odor, water near power, or repeated breaker interruption requires stop use.

Why are E-Nr, FD, and Z-Nr all useful before a Thermador diagnostic visit?

Answer: Thermador's model-number finder uses the rating plate to establish the product, while the manufacturer's registration fields separately request E-Nr, FD, and Z-Nr. Together they narrow the exact product and production context; none is an error code, and identity alone does not explain the symptom. Send one readable photo of the complete label plus the literal display and failed function. Use the E-Nr to select the matching owner manual instead of applying instructions from a visually similar Thermador appliance.

How to Read the Display: Fault Code, Status, or Appliance ID?

  • Fault-like format: Thermador does not use one universal shape. Dishwasher generations can show E15, E24, E-24, E3100, E6102, E61-02, or low-supply-voltage route E27. Ovens can beep with E plus a number, while named update routes include E0211, E1601, and E0510. Induction supply routes include E9000, E9010, or U400. Use the official dishwasher, oven, and range/cooktop guides with the full E-Nr. A code does not prove a component or establish whether an electrical condition is building-side or appliance-side.
  • Status or operating message: Dishwasher UP means a completed software update on supported controls. Induction dE with cold zones identifies Demo mode. Gas-range XLO identifies ExtraLow, where a designated flame can cycle intentionally. A Kitchen Timer ending while heat continues can also be expected because it does not control the cavity.
  • Appliance ID: E-Nr, FD, and Z-Nr are rating-label identifiers. The full E-Nr is the model; appearance does not establish fuel or generation.
  • Service-mode or internal value: Characters reached only through an undocumented service, calibration, or update sequence are not automatically owner-facing faults. Do not change offsets, gas settings, stored values, or update parameters.
  • What to photograph: Capture the entire panel, exact punctuation, blinking or beeping, door position, selected mode, affected function, Home Connect context, and full rating label.

Use Thermador's error-code index and exact product category. If a display is not listed, preserve it rather than borrowing a meaning from another BSH brand or generation.

Safe Checks Before Requesting Service

  • Confirm normal mode, timer type, control lock, XLO, Demo, update, or door-display state through ordinary controls.
  • Photograph the exact display and full label before a power cycle.
  • For a gas burner, let a cool surface dry and confirm normally removable burner parts are seated as the manual shows; stop immediately for gas odor or delayed ignition.
  • For induction, use a known-compatible pan on a clean, dry surface and compare zones without entering hidden menus.
  • For an oven, record cavity, mode, setpoint, preheat behavior, timer type, and whether a real oven-off command ends heat.
  • For refrigeration, record actual compartment temperatures, doors, power history, moisture, frost, and ventilation.
  • For a dishwasher, record the last stage, visible water, display position, and only the normally accessible filter or sink condition.

Mistakes That Can Make the Problem Worse

Identifying a Thermador product from its Pro silhouette or knob color.

Why it causes problems: Similar products can be gas, dual-fuel, electric, or induction with different controls and diagnostic routes.

Safer next step: Photograph the complete E-Nr, FD, and Z-Nr before selecting the platform.

Calling normal ExtraLow cycling a failed igniter—or ignoring a failed relight because cycling can be normal.

Why it causes problems: Designed off/on timing and abnormal ignition are different; confusing them can create needless work or hide gas risk.

Safer next step: Preserve knob position and behavior, then stop for gas odor, delayed ignition, or a flame that does not relight normally.

Treating dishwasher UP as a drain, heater, or leak fault.

Why it causes problems: Thermador identifies it as a software-update message, so parts guessing ignores the separate physical cycle result.

Safer next step: Clear it only through the documented normal control and evaluate fill, wash, drain, heat, and completion separately.

Dropping hyphens or leading digits from E-24, E61-02, or another code.

Why it causes problems: Format can identify generation and route; a shortened transcription can be matched to another appliance.

Safer next step: Photograph the full panel and E-Nr rather than transcribing from memory.

Resetting E15/E3100 or tilting a panel-ready dishwasher to make it disappear.

Why it causes problems: Water can move into cabinetry or powered areas, panel and hose connections can be damaged, and leak evidence can be lost.

Safer next step: Stop use, close the accessible inflow when safe, keep the unit level, and plan built-in access.

Moving a range, wall oven, refrigeration column, or custom-panel dishwasher.

Why it causes problems: Gas, 240-volt power, water, panel, floor, cabinet, and ventilation constraints can create a second hazard.

Safer next step: Send wide photos and building requirements so access is scoped first.

Where the Homeowner-Safe Limit Ends

  • Homeowner-safe: Use normal controls; confirm mode, timer, Demo, XLO, update, door position, and compatible cookware; inspect only cool, normally removable parts identified by the manual; record display, temperature, stage, flame, and installation evidence.
  • Technician or utility boundary: Stop at gas odor or failed relight, returning leakage protection, supply-voltage codes, repeated breaker trips, powered panels, internal drain or cooling paths, calibration or service menus, locked mechanisms, and movement of built-in or connected appliances.

Stop-Use and Food-Safety Conditions

  • Persistent gas odor, delayed ignition, or flame that will not relight: Leave the area, avoid switches and flames, and contact 911 or the serving gas utility from a safe location.
  • Smoke, sparks, burning odor, repeated breaker trip, or uncontrolled heat: Stop use and do not keep cycling power.
  • Cracked induction or electric glass: Stop cooking use and avoid touching or testing the damaged surface.
  • Dishwasher E15/E3100, visible leak, or water near powered parts: Stop use, close the accessible inflow if safe, and do not tilt or extract the appliance.
  • Rising refrigeration temperature: Protect perishables based on measured temperature and elapsed time; a lit control or muted alarm does not prove cooling.
  • Oven door, latch, or heat cannot be controlled normally: Leave the cavity off and do not pry the door or run self-clean as a test.

Service Boundaries

  • Volt & Vector provides independent appliance repair, not Thermador warranty administration, installation, cabinetry modification, gas-line alteration, branch-circuit work, plumbing modification, or building-ventilation service.
  • Professional styling does not confirm every Thermador model, fuel, connected feature, commercial product, coffee system, microwave, speed oven, warming drawer, or ventilation configuration.
  • Recall or safety-notice status must be checked against the exact model and production identity, not appearance.
  • Submit an unlisted product with the complete rating label and installation photos before dispatch.

Request Thermador Appliance Repair in NYC

Use the online booking request or call +1 (332) 333-1709. Include the complete E-Nr/FD/Z-Nr, product and fuel, affected burner/zone/cavity/compartment/cycle, exact display, safety status, address, and built-in access photos.

Booking

Appliance Repair in NYC

Choose a time that works for you. Share the appliance type, address, and the issue you are seeing. We review the request and confirm the appointment details before the visit is finalized.

$99 diagnostic

Credited toward repair after approval

180 day warranty

Parts and labor on completed repair

OEM parts

Used when applicable and available

Licensed and insured

COI available if building requires it

What Happens Next

You send the request with the appliance type, location, and symptom.

We review the details and confirm service area, timing, and access notes.

If needed, we may ask for a model and serial photo before the visit.

Before You Book

If you smell gas, see sparks, notice a burning odor, or have an active water leak near electrical parts, stop using the appliance and handle the safety issue first.

Baseline experience standard

Volt & Vector sets a hard baseline of 4+ years of hands-on appliance repair experience per technician. Senior technicians bring 8 years and 16 years in the field, which helps maintain consistent on-site decision quality across different appliance platforms and install constraints.
Fact: Minimum 4+ years per tech; senior techs with 8 and 16 years.

Prior manufacturer-authorized service environment experience

Team backgrounds include prior roles inside manufacturer-authorized service environments and within warranty-service procedures, where technicians are trained to follow required test steps, record outcomes, and close jobs with audit-ready notes.
Fact: Prior roles included authorized-service environments and warranty-service workflows.