Appliance repair service in New York City - Brooklyn

Bosch Dryer Hot but Clothes Wet: Safe Checks

Diagnostic fee: $99, credited toward the repair if you move forward
Warranty: 180-day parts and labor warranty on completed repairs
Arrival windows: 9 to 11, 11 to 1, 1 to 3, 3 to 5

When a Bosch dryer gets hot but clothes stay wet, check washer spin, load movement, filters, sensors, and the correct vented or ventless moisture path.

What’s really happening

Drying requires more than heat. The drum must lift and separate the textiles; a controlled air stream must absorb water from them; and that moisture must leave through an exhaust duct or be processed through a condenser or heat-pump system. If the air path or moisture-disposal stage is restricted, the drum can feel hot while laundry remains uniformly wet.

This page is for a narrower symptom than “not drying”:

  • The load is noticeably warm or hot, yet remains broadly wet or very damp.
  • The dryer may run long, add time, or finish without reaching the expected result.
  • Filters may look clean but carry a fine film or a second hidden user-serviceable layer.
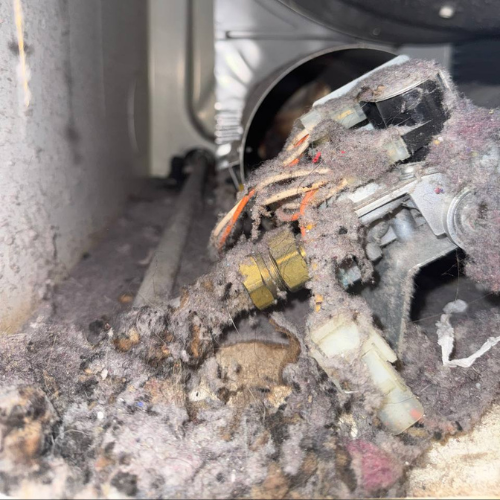
  • A vented unit may retain hot humid air because the exhaust path is restricted.
  • A ventless unit may be unable to process or drain condensate normally.
  • Laundry may have entered the dryer unusually wet because the washer failed to drain or spin correctly.

Use a different path if the laundry stays cold on a confirmed heated program. Use a leak path if water appears under the dryer. A few damp seams on otherwise dry items can be a normal load-mix issue and does not match uniformly wet laundry.

Bosch vented, condensation, and heat-pump dryers do not share the same care points. Identify the E-Nr/model and FD information before opening a filter flap or following advice about vents, condensers, heat exchangers, water containers, or drains.

Overheat safety gate

Stop the dryer if the cabinet, door, plug, outlet, cord, room, or laundry becomes unusually hot; if there is a burning or melting odor; or if the machine stops and restarts with heat. Do not keep adding high-temperature time to force a wet load dry. Heat trapped by poor airflow can create a fire risk and damage textiles.

Do not run a vented dryer with its exhaust intentionally disconnected as a test. Do not remove filters, panels, or safety devices during operation, and do not push air through a building duct with a leaf blower or improvised device.

Ranked action plan

Low effort: verify the load brought into the dryer

Check the washer’s final result

Why it works: A dryer that receives waterlogged laundry must remove far more moisture. A washer drain, balance, or final-spin failure can make a normal dryer appear unable to finish.

Tools/materials: Washer display, load notes, and fabric-care labels.

What to do:

  • Check whether the washer ended with a drain, spin, or unbalance message.
  • Compare the load’s weight and dripping condition with a familiar load.
  • Untangle items before transferring them.
  • If care labels allow, correct the washer issue and complete an appropriate spin.
  • Do not put dripping laundry into the dryer.

Common mistakes:

  • adding dryer time without checking the washer.
  • confusing a warm load with adequate drying.
  • running a washer Spin cycle when standing water or a drain fault remains.
  • using heat to compensate for an unsuitable textile-care method.

Correct load size and tangling

Why it works: Hot air cannot reach wet surfaces when a packed load rotates as one mass or sheets wrap around smaller items.

Tools/materials: Clean basket.

What to do:

  • Separate sheets, duvet covers, and long garments.
  • Remove enough items for clear lifting and falling.
  • Dry heavy cottons separately from light synthetics when their rates differ.
  • Use an appropriate program and target dryness for the textile.
  • Avoid one dense bulky item as the only comparison load unless the manual supports it.

Common mistakes:

  • using maximum drum capacity for every program.
  • adding dry towels as an improvised cure.
  • restarting the same tangled load.
  • selecting the hottest program rather than correcting movement.

Confirm the program is a drying program

Why it works: Gentle, low-temperature, air, refresh, or shortened settings can leave a heavy load damp even when the drum feels warm.

Tools/materials: Control photo and program chart.

What to do:

  • Photograph the cycle and active options.
  • Confirm the program matches the fabric and load amount.
  • Check the target dryness or timed setting.
  • Run one controlled comparison after correcting the load and filters.

Common mistakes:

  • assuming every cycle delivers the same heat and airflow.
  • increasing temperature beyond the care label.
  • changing multiple settings and losing the original evidence.
  • treating estimated time as a fixed promise on a sensor program.

Medium effort: restore owner-serviceable airflow and sensing

Clean and dry all user-accessible lint filters

Why it works: Lint and invisible product film reduce airflow. Bosch includes filter care among the first not-drying checks.

Tools/materials: Soft cloth or brush, vacuum attachment where approved, water only when the exact manual allows washing.

What to do:

  • Turn the dryer off and let it cool.
  • Remove lint from every filter layer identified for the model.
  • Clean the accessible seating recess without pushing lint into openings.
  • If washing is allowed, protect the mesh and let every piece dry fully.
  • Reinstall each part in the correct direction and fully close the flap.

Common mistakes:

  • cleaning only the most visible screen.
  • running the dryer without a filter.
  • reinstalling a wet filter.
  • using compressed air, sharp tools, or aggressive brushing.

Clean accessible moisture-sensor surfaces

Why it works: Residue on the sensor surfaces can affect automatic-cycle feedback, especially when load contact is already limited.

Tools/materials: Soft cloth and only the cleaning method in the Bosch guide.

What to do:

  • Switch power off.
  • Locate only the sensor surfaces shown for owner care.
  • Wipe gently with the approved method.
  • Do not sand, scrape, or saturate the drum.
  • Compare one similar automatic cycle and record whether timing changes.

Common mistakes:

  • assuming sensor residue explains severe overheating.
  • pouring cleaner into seams.
  • removing drum parts or wiring covers.
  • using one tiny item to evaluate an automatic cycle.

Identify the platform and service its moisture path

Why it works: Vented dryers exhaust moisture outside. Condensation and heat-pump dryers process water internally and may use model-specific lower filters, condenser or heat-exchanger care, a water container, or a drain connection.

Tools/materials: E-Nr/model photo, exact manual, flashlight, towels.

What to do:

  • Determine whether the model is vented or ventless.
  • On a vented model, inspect only the accessible connector and safe exterior termination.
  • On a ventless model, empty and seat the water container if equipped.
  • Clean only the lower filter, condenser, or heat-exchanger area assigned to owner care.
  • Check the accessible drain hose for a kink or displaced connection where the unit uses direct drain.

Common mistakes:

  • applying vent instructions to a heat-pump dryer.
  • washing a component the manual says to vacuum or leave in place.
  • bending delicate heat-exchanger fins.
  • pulling a stacked dryer to see the rear.
  • interpreting lower operating temperature as a no-heat fault.

High effort: separate building airflow from machine operation

Assess the accessible vent route on a vented model

Why it works: A crushed connector, lint restriction, stuck exterior flap, or unsuitable concealed run can trap hot humid air.

Tools/materials: Flashlight and professional vent service for concealed or shared ducts.

What to do:

  • Turn the dryer off.
  • Inspect the visible connector for crushing, sharp bends, separation, and lint.
  • From a safe location, check that the exterior termination is not visibly blocked.
  • Determine whether an apartment duct is private, shared, or building-controlled.
  • Arrange appropriate duct inspection rather than disconnecting the dryer.

Common mistakes:

  • evaluating airflow by hand at a hazardous exterior location.
  • running the dryer vent into the room.
  • using screws that protrude into a duct or unsuitable flexible material.
  • pushing lint deeper into a shared run.

Run one matched-load comparison and escalate

Why it works: A repeatable hot-but-wet result after correcting incoming moisture, load movement, filters, sensing surfaces, and the approved moisture path gives diagnosis a clean starting condition.

Tools/materials: E-Nr/model, program photo, start/end load condition, time record, temperature description, error photo, and video.

Ask diagnosis to separate:

  • actual airflow volume and blower operation;
  • exhaust or ventless heat-exchange restriction;
  • condensate collection or pumping;
  • temperature and moisture feedback;
  • unstable heating or control output;
  • installation and room-air conditions.

Common mistakes:

  • ordering a heating element when the dryer clearly produces heat.
  • replacing a moisture sensor without comparing automatic and timed behavior.
  • clearing a warning repeatedly.
  • continuing tests during abnormal heat.

Stop DIY and call a professional if…

  • Laundry, cabinet, plug, outlet, cord, or room becomes abnormally hot.
  • Airflow appears absent, the dryer repeatedly stops, or an error returns.
  • There is smoke, burning or melting odor, arcing, or a repeated breaker trip.
  • Water leaks from a ventless dryer or reaches electrical areas.
  • Filters or condenser areas are damaged, jammed, or cannot be seated.
  • A concealed or shared vent needs cleaning.
  • The dryer is stacked or any panel, blower, heater, pump, sensor wiring, or control requires access.

If smoke or fire occurs, leave and call 911. If a gas-equipped installation has an unburned-gas odor, do not operate electrical controls; leave and contact 911 and the gas utility from a safe location.

Maintenance cadence

Weekly

  • Clean the user-accessible lint filter surfaces as the manual directs.
  • Notice whether similar loads enter unusually wet or leave hotter and wetter.

Monthly

  • Wipe accessible moisture-sensor surfaces by the approved method.
  • Check the dryer’s room-air intake and loading area for obstruction.

Quarterly

  • Inspect the accessible vent connector on a vented model.
  • Complete the documented lower-filter, condenser, heat-exchanger, container, or drain care on a ventless model.

Annual

  • Arrange assessment of concealed or shared exhaust responsibility where applicable.
  • Inspect accessible cord, plug, receptacle, drain connection, stacking hardware, and installation clearance.

FAQ

Why does my Bosch dryer get hot but clothes stay wet?

Heat is present, but the load may be too wet or tangled, airflow may be restricted, or the vented or ventless moisture path may not be processing water correctly.

Is this the same as a Bosch dryer not heating?

No. A no-heat load stays cold on a confirmed heated program. Hot-but-wet points first toward incoming moisture, load movement, airflow, or moisture disposal.

Can the washer cause hot-but-wet drying?

Yes. If the washer does not drain or spin properly, the dryer receives much more water than normal.

Can a clean-looking filter still restrict airflow?

Yes. Fine lint or product film can reduce airflow, and some models have more than one user-accessible filter layer.

How do I know if my Bosch dryer is ventless?

Use the E-Nr/model and installation manual. Do not decide from appearance or apply an exhaust-vent procedure to a condenser or heat-pump model.

Can a clogged vent make the dryer hotter?

A restricted exhaust can retain heat and humid air. Stop if conditions are abnormally hot and arrange proper vent inspection.

Should I run the dryer with the vent disconnected?

No. It can release lint, heat, moisture, and combustion products into the home and is not a safe generic test.

Does a warm drum prove the heating system is normal?

No. Heat may be present but unstable or poorly controlled, and airflow or moisture disposal may still be inadequate.

Why does the cycle end while clothes are still wet?

Program choice, limited sensor contact, sensor-surface residue, load composition, or a fault may affect the endpoint. Preserve whether timed and automatic behavior differ.

What information helps diagnosis?

Provide E-Nr/model, dryer platform, washer-spin result, program, load size, end temperature, filter and moisture-path care, timing, error, and vent or drain details.

Sources you would cite

Booking

Appliance Repair in NYC

Choose a time that works for you. Share the appliance type, address, and the issue you are seeing. We review the request and confirm the appointment details before the visit is finalized.

$99 diagnostic

Credited toward repair after approval

180 day warranty

Parts and labor on completed repair

OEM parts

Used when applicable and available

Licensed and insured

COI available if building requires it

What Happens Next

You send the request with the appliance type, location, and symptom.

We review the details and confirm service area, timing, and access notes.

If needed, we may ask for a model and serial photo before the visit.

Before You Book

If you smell gas, see sparks, notice a burning odor, or have an active water leak near electrical parts, stop using the appliance and handle the safety issue first.

NYC Appliance Repair Help & Guides

Practical appliance repair guides based on real service calls in New York City. Find common problems, error codes, troubleshooting steps, and repair information for refrigerators, washers, dryers, dishwashers, ovens, ranges, and other home appliances.